baconwrappedbarbells


Leave a comment

Slower Cooker Pulled Pork (Carnitas)(Paleo, Primal, Gluten-Free)

139A5118

My family didn’t eat a lot of pork when I was growing up.  We stuck mainly with chicken, beef, and seafood.   We occasionally ate bacon when traveling on family vacations, but it wasn’t a part of our daily diet.

Once free of my parent’s clutches ;), and free of my fear of fat after embarking on health and lifestyle change upon learning about the Paleo diet, I got the green light to dive into bacon!

139A5108

Just kidding.  While I love bacon, I use it primarily as a flavor enhancer for roasted vegetables (check out my recipe here for roasted Brussels sprouts and sweet potatoes with bacon).  I’m sure, based on the name of my blog, you may imagine me sitting down with plates piled high with bacon.  Only in my dreams………..

139A5168

Sorry, I got distracted talking about bacon.  Where was I again?  Right, not having a lot of experience with cooking pork.  Well, I decided to get out of my comfort zone, and figured carnitas were the way to go!

139A5203

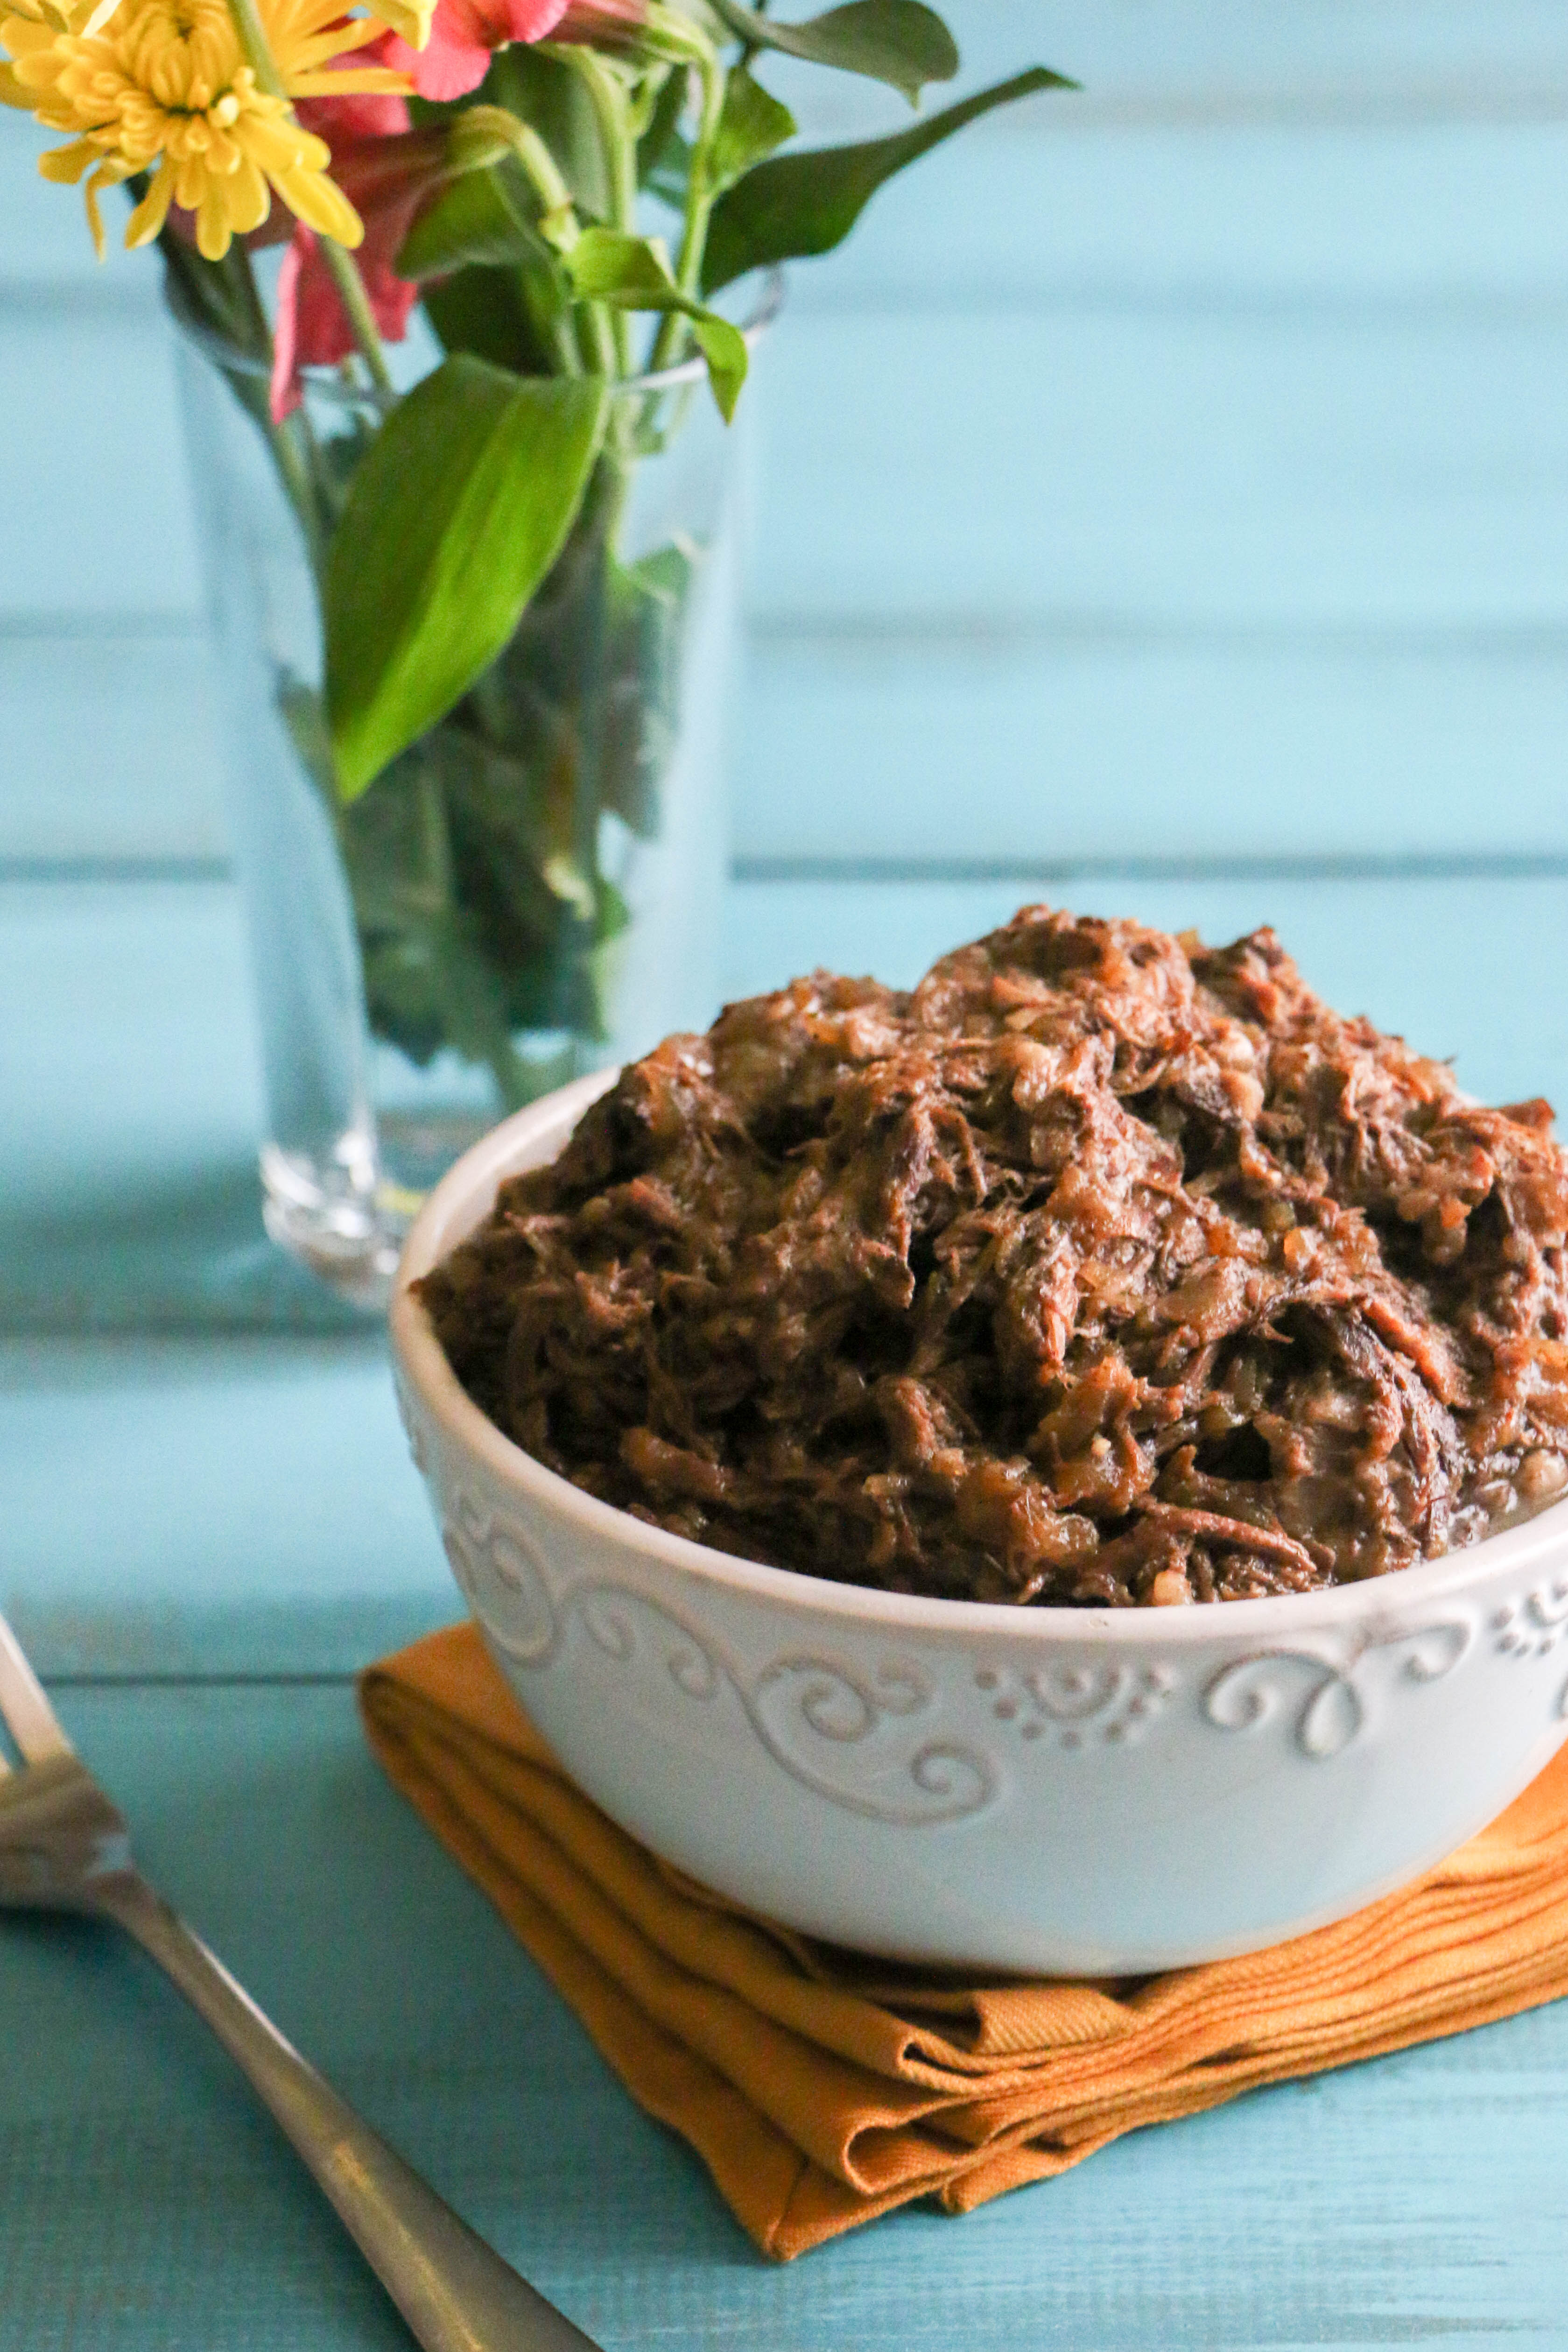
It was a good decision.  These carnitas are full of flavor, seasoned with bold Mexican spices like oregano, cumin and garlic.  In addition, the acidity from the orange juice and the lime juice along with the low and slow heating process using a slow cooker transform the pork into tender and delicious chunks of meat!

Slow Cooker Pulled Pork (Carnitas)

Servings: 8-10


Ingredients:

3 ½ – 4 pounds’ boneless pork shoulder, cut into 2 inch chunks (visible fat trimmed)

2 large oranges, juiced (approximately 1 cup) (keep spent halves of one orange)

Zest from one orange

1 lime, juiced (approximately 2 tablespoons)

1 tablespoon dried oregano

2 tablespoons minced garlic

2 teaspoons salt

2 teaspoons cumin

1 teaspoon pepper

t teaspoon paprika

1 large onion, peeled and sliced into quarters

2 bay leaves

2 cups water

Directions:

  1. Combine the oregano, salt, pepper, paprika, cumin, garlic and orange zest in a small bowl, stirring to combine.
  2. Coat the pork with the seasoning, and then place the pork in the bottom of a large slow cooker.
  3. Add the orange halves, the onion quarters and the two bay leaves to the slow cooker.
  4. Pour the orange juice, lime juice and water into the slow cooker.
  5. Cover the slower cooker, and cook the pork on low for approximately 8-10 hours (low and slow is the way to go!).
  6. Once the pork is cooked (you’ll know the pork is done when it shreds easily with a fork), turn the slow cooker off and remove the pork from the liquid, placing the pork into a large bowl.
  7. Shredded the pork into smaller pieces with two forks, and then its ready to serve.
  8. Use the pulled pork in your favorite taco shells, and top with your favorite toppings (e.g., pico, salsa, sour cream, cheese, cilantro, pico de gallo, etc.).

Inspired by Cook’s Illustrated Mexican Pulled Pork Carnitas 


2 Comments

Creamy Chicken Fajita Spaghetti Squash Casserole (Gluten-Free, Grain-Free, Primal, Low-Carb)

Food critics rave over this dish, giving it two thumbs up!

139A9388

And by “food critics”, I mean a five year old boy.

139A4934

Food critic in action!

And by “two thumbs up”, I mean I think he thought it was okay.

139A4939

Mother and son working it out!

I invited some new members at my CrossFit gym over to dinner at my home a couple of weeks ago to test out a variation of this recipe.  They brought along their five year old son.  At first he refused to even taste the dish.  After some encouragement from his mom, he agreed to try a small serving.  I braced myself for his reaction.

139A9386

After a couple of bites, he looked at me and said, “I like macaroni and cheese.  This tastes kinda like macaroni and cheese.”  To seal the deal, he asked for a second helping.

139A9418

Since it’s received a 5 year old’s blessing, you know it has to be good.  Enjoy!

Creamy Chicken Fajita Spaghetti Squash Casserole (Paleo-Friendly option below)

Servings: 8-10


Ingredients:

  • large spaghetti squash (1 1/4 to 1 3/4 lbs)
  • 2 pounds chicken tenders
  • 16 ounces chunky salsa
  • 1 cup sour cream
  • 8 ounces shredded cheddar cheese
  • 8 ounces shredded Monterey jack cheese
  • 1 onion, thinly sliced
  • 1 red bell pepper, thinly sliced
  • 1 green bell pepper, thinly sliced
  • 2 1/2 tablespoons olive oil for cooking (can substitute butter, avocado oil or other preferred cooking oil)

Fajita Seasoning:

  • 1 1/2 tablespoons chili powder
  • 2 teaspoons sea salt
  • 1 teaspoon black pepper
  • 1 teaspoon cumin
  • 1 teaspoon dried oregano
  • 1 teaspoon paprika
  • 1 teaspoon garlic powder
  • 1 teaspoon coriander
  • 1/4 teaspoon red pepper flakes

Instructions:

  1. Preheat oven to 375 degrees.
  2. Line a large baking sheet with parchment paper.
  3. Cut spaghetti squash in half lengthwise.  Scoop out the seeds from the center of each half of the spaghetti squash.*
  4. Place the spaghetti squash cut side down on the lined baking sheet, and bake in the oven for approximately 35-40 minutes until tender (you’ll know the squash is done if you can pierce the spaghetti squash noodles easily with a fork).
  5. Once the spaghetti squash has cooked, take it out of the oven, flip the halves over and let the squash cool.
  6. Once the spaghetti squash has cooled enough to handle, use a fork to scrap the squash noodles into a large mixing bowl.
  7. While the spaghetti squash is cooling, mix together the fajita seasoning.  Reserve 1 tablespoon of the fajita seasoning mix.
  8. Heat a large skillet over medium high heat.  Once the skillet is hot, add 1 1/2 tablespoons olive to the skillet.
  9. Add the chicken tenders to the heated skillet, then add the fajita seasoning mix (reserve 1 tablespoon of the fajita seasoning mix for later use).
  10. Sauté the chicken in the large skillet over medium high heat until cooked through, 12 to 15 minutes.  Once the chicken has cooked, remove the skillet from the heat and set aside, allowing the chicken to cool slightly.  Once the chicken has cooled, chop the chicken tenders into 1/2 – 1 inches pieces.
  11. Heat a large skillet over medium high heat.  Once the skillet is heated through, add 1 tablespoon of olive oil.
  12. Add the sliced peppers and onions to the heated skillet, then add the remaining tablespoon of fajita seasoning mix.
  13. Sauté the vegetables over medium high heat until softened, 10 to 12 minutes.  Once the veggies are done, remove the skillet from the heat and set aside to allow the veggies to cool slightly.
  14. Preheat the oven to 350.
  15. While the oven is preheating, in a medium size bowl, mix together the cheddar and Monterey jack cheeses, salsa and sour cream.
  16. Add the chicken and veggies to the spaghetti squash in the large mixing bowl and stir to combine.  Then add the sour cream, cheese and salsa mixture and stir to combine.
  17. pour the mixture into a 9 x 13 baking pan.
  18. Place the baking pan in the middle of the oven, and bake until heated through, approximately 40-45 minutes.
  19. Once the casserole is done, take out of the oven, serve and enjoy!

Notes:

  •  Quick tip, to make the spaghetti squash easier to cut, microwave for 1-2 minutes to soften the shell before attempting to slice.
  • To make the recipe Paleo friendly, omit the dairy (the cheese and sour cream). Starting at Step 16, once you have mixed the chicken, veggies, spaghetti squash and salsa together, add in 4 large eggs (beaten) and stir until combined.  Pour the mixture into a 9 x 13 baking pan.  Place the baking pan in the middle of the oven, and bake until heated through and the egg is no longer runny, 65-75 minutes.  Once the casserole is done, take out of the oven, serve and enjoy!


Leave a comment

Maple and Balsamic Vinegar Roasted Sweet Potato Frittata with Caramelized Onions, Bacon and Gruyere Cheese (Gluten-Free, Grain-Free, Paleo Friendly)

139A7120

I made the BEST QUICHE EVER.  The flavor profile included a combination of sweetness from maple vinegar (that I purchased from a local olive oil specialty store), along with the salty deliciousness that only bacon can provide.  The addition of an onion caramelized in butter and maple vinegar along with copious amounts of Gruyere cheese took the quiche to the next level.  The first bite of quiche was a taste explosion in my mouth.  I was in heaven.  I made the quiche for a monthly potluck with the women from my CrossFit gym.  The ladies loved it, and one of my friend’s Becky texted me later on that night after I got home to  tell me it was hands down the  best quiche she had ever tasted.

139A7155

I should be happy about this, right?  I make an amazing quiche that everyone loves.  What could be wrong?  Well, I didn’t write down the modifications I made to the original quiche recipe I adapted from Spicy Southern Kitchen, and therefore couldn’t remember the exact steps I made to create the quiche.  I went to recreate the quiche the next week, but after the first bite I noticed that it didn’t have the same flavor.  I MADE THE PERFECT QUICHE AND COULDN’T REMEMBER HOW TO RECREATE IT.  I was absolutely horrified.  What had I done?  After I finished my dramatic hysterics, I calmed down and got to work attempting to recreate the quiche recipe.  The result is this recipe, which I am happy to share with you below.

139A7123

Maple and Balsamic Vinegar Roasted Sweet Potato Frittata with Caramelized Onions, Bacon and Gruyere Cheese

Recipe adapted from Spicy Southern Kitchen

Servings: 8-10


Ingredients:

  • one medium purple sweet potato, peeled and cubed into 1/4 inch cubes
  • one medium regular sweet potato, peeled and cubed into 1/4 inch cubes
  • 1 large onion, peeled and thinly sliced
  • 2 1/2 cups Gruyere cheese
  • 3 tablespoons balsamic vinegar
  • 3 tablespoons pure maple syrup
  • 2 tablespoons olive oil
  • 1 1/2 tablespoons butter
  • 6-9 slices of bacon, cooked and crumbled
  • 8 large eggs
  • 1 cup whole milk
  • 1 tablespoon Italian seasoning
  • 2 teaspoon sea salt, divided
  • 1 1/2 teaspoon black pepper, divided
  • 1 teaspoon garlic powder

Instructions:

  1. Preheat oven to 425 degrees.
  2. Place the cubed sweet potatoes in a large-sized bowl.  Add 2 tablespoons maple syrup, two tablespoons balsamic vinegar, two tablespoons olive oil, 1 teaspoon salt, 1/2 teaspoon black pepper, Italian seasoning and toss to coat.
  3. Line a baking sheet with parchment paper.
  4. Pour the sweet potatoes on the baking sheet into a single layer, and place in the oven.  Roast the sweet potatoes for 30 minutes, removing the sweet potatoes half way through to stir.
  5. Once the sweet potatoes have finished roasting, remove them from the oven and set aside.
  6. Heat butter in a large skillet over medium-heat.  Add the onions to the preheated skillet, and stir until the slices are evenly coated with the butter.  Continue to stir regularly for 5 to 10 minutes until the onion slices begin to soften.
  7. Once the onion slices have softened, turn the heat to low, and continue to cook the onions, stirring every few minutes.  The onions will begin to brown and caramelize in about 35 to 45 minutes.
  8. After the onions have finished caramelizing, stir in 1 tablespoon of balsamic vinegar and 1 tablespoon of maple syrup, and continue cooking the onions for 3-5 more minutes before removing the skillet from the heat.
  9. Preheat the oven to 350 degrees.
  10. In a large bowl, whisk together the eggs, milk, 1 teaspoon salt and 1/2 teaspoon black pepper.
  11. Mix together the roasted sweet potatoes, caramelized onions and bacon crumbles.
  12. In a 9 inch pie dish, layer half the sweet potato/onion/bacon mixture.  Then layer on 1/2 of the Gruyere cheese.
  13. Repeat the layer with the remaining half of the sweet potato/onion/bacon mixture and then the remaining 1/2 of the Gruyere cheese.
  14. Pour the egg and milk mixture into the pie pan over the pie filling.
  15. Line a baking pan with foil or parchment paper, and place the pie dish on the lined baking sheet.
  16. Place the dish in the middle of the oven, and bake until set, approximately 45-50 minutes.
  17. Once the frittata it is done, take out of the oven and let set for 15-20 minutes before slicing .


Leave a comment

Chestnut Flour Tortillas (Paleo friendly, Gluten-free, Grain-free)

139A9244

This recipe involves chestnut flour, which isn’t commonly used, even in gluten-free baking.  Chestnut flour is made from chestnuts that have been dried, the outer peel removed and then ground.  The result is a very fine powder that looks gray-tan in color.  Chestnut flour is typically imported from France or Italy.  Chestnut flour has a sweet flavor, and is commonly used in a variety of Italian dessert recipes.  It’s also used to make pasta, breads, and other savory dishes.

139A9250

I first learned about chestnut flour when I saw a post for a Paleo chocolate chip cookie recipe from James Trenda on Instagram.  The cookies looked drool worthy, and I was excited to try out a new gluten-free chocolate chip recipe that had promising results.  I wasn’t able to locate chestnut flour in any local stores, but Amazon carries the flour online.  The cost for chestnut flour is somewhat pricey, but I decided to bite the bullet and get it.  Thankfully, the results were worth it.  The cookies were completely out of this world, and my friends (both Paleo and gluten-loving) gave them a big thumbs up!

139A9307

I had leftover chestnut flour after making the chocolate chip cookie recipe, and decided to experiment with the flour in other types of baking.  My first experiment involved making gluten-free tortillas, and now I get to share the results with you guys!

Enjoy and as always, please share your results in the comments below.

Chestnut Flour Tortillas

Recipe adapted from Serious Eats Flour Tortilla recipe.

Servings: 4-5


Ingredients:

  • 1 and 1/2 cups chestnut flour
  • 1/2 cup tapioca flour
  • 3/4 cup cold water
  • 1/4 cup organic vegetable shortening (can use butter or lard to make Paleo friendly )
  • 1 teaspoon sea salt

Instructions:

  1. In a medium-sized bowl, whisk together the chestnut flour, tapioca flour and salt.
  2. Add in vegetable shortening, and using a fork press the shortening into the flour (flour will be somewhat crumbly, make sure no large chunks of shortening remain).
  3. Add water to the bowl, and mix until the dough is smooth and sticks together (If the dough is too wet, add more chestnut flour.  If the dough is too dry, add water, one teaspoon at a time until the dough reaches the right consistency).
  4. Lightly sprinkle a clean surface with chestnut flour, and knead the dough for approximately 1 minute.
  5. Let the dough rest for 30 minutes.
  6. After the dough has rested, shape the dough into 8-10 balls (depending on how big you want them), and place the balls back in the bowl. Cover the bowl with a towel so that the dough retains its moisture.
  7. Heat a cast iron skillet to medium-high heat.
  8. While the skillet is heating up, flatten a ball of dough using a tortilla press (if you don’t have a tortilla press, place the dough in between two pieces of parchment paper and flatten using a rolling pin).
  9. Once the skillet is heated, place the flatten dough into the skillet until bubbles begin forming and bottom begins to slightly brown, approximately 45 to 60 seconds.
  10. Flip the tortilla over and cook an additional 30-45 seconds. Then remove the tortilla from the heat.
  11. Repeat steps 8 through 10 to cook the remaining tortillas.

139A9305


Leave a comment

White Chocolate, Lemon and Coconut Date Balls

IMG_0080

I created this recipe for White Chocolate, Lemon and Coconut Date Balls out of a strong desire to eat body lotion.  WAIT WHAT????????

Okay, let me back track a little bit, I don’t want you to think I’ve gone completely mad.  One of my co-workers is very passionate about using skincare products that are effective, natural, safe and made with minimal to no chemicals or other harmful toxins.  So passionate in fact, that she supplies high quality soap and hand lotion for employees at my job.  The most recent jar of hand lotion she provided was scented with coconut and lemon.  I really love its light and airy scent.

One day, I was feeling the munchies pretty bad (it was clearly time for a high protein snack, but I digress).  After using the lotion and smelling it on my hands, I thought to myself, this smells good enough to eat!  Thankfully I resisted the urge to consume the body lotion.  I also immediately started brainstorming ways to combine the flavors of coconut and lemon into a tempting treat.

This recipe is an adaptation of my orange and dark chocolate energy balls.  The link to that recipe can be found here.

IMG_0136

For those of you who love coconut, this recipe uses several different kinds of coconut products; shredded coconut, coconut oil and coconut butter,  adding several layers of texture to the overall coconut flavor in the date balls.

The white chocolate and dates add sweetness, and the lemon extract and lemon zest give the date balls a burst of lemony freshness and zing.

IMG_0100

These date balls are perfect to bring to a party.  Your friends will be very happy if you make these to share.  Enjoy!

White Chocolate, Lemon and Coconut Date Balls

Servings: makes 27-30 date balls


Ingredients:

  • 2 cups almonds
  • 15 mejool dates, pitted
  • 1 cup shredded coconut, divided
  • ¾ cup white chocolate chips
  • ½ cup coconut butter
  • 2 tablespoons coconut oil
  • 2 teaspoons pure lemon extract
  • 2 teaspoons vanilla extract
  • Zest from one lemon
  • 1 teaspoon sea salt

Instructions:

  1. Place the almonds in the bowl of a food processor. Pulse almonds in food processor until they form small crumbs. Pour the almonds into a large bowl, and set aside.
  2. Place the mejool dates in the food processor, and puree until smooth.
  3. Add the almond crumbs back into the bowl of the food processor. Reserving ½ cup of shredded coconut, add the remaining ingredients into the bowl of the food processor, and process until the ingredients have fully incorporated, the mixture becomes sticky and you can form the dough into balls.
  4. Line a large baking sheet with parchment paper.
  5. Place a golf size ball of the almond coconut mixture in the palm of your hand, press the dough together and roll into a ball. Once the ball has been rolled, place on the parchment lined baking sheet.
  6. Repeat with the remaining mixture.
  7. Pour ½ cup of shredded coconut onto a large plate. Roll a date ball in the coconut mixture, and place back on the parchment lined baking sheet after it has been coated with the shredded coconut.  Repeat with the remaining date balls until each one has been coated with shredded coconut.
  8. Place the baking sheet with the date balls in the fridge for 20-30 minutes (or in the freezer for 10-15 minutes) to become firm.
  9. After 10-15 minutes, take them out of the fridge (or freezer), serve and enjoy! The remaining date balls should be kept refrigerated or frozen.


Leave a comment

Slow Cooker Chili

IMG_0027

Peanut butter, sugar, beer, pickle juice and chocolate.  What doe these things have in common?  These are some of the things people swear by when making chili.  I was somewhat surprised by the type and variety of ingredients people add to their chili recipes when doing research to create my own slow cooker chili recipe.  In addition to the ingredients mentioned above, I also viewed recipes that called for coffee, masa (made from corn and used as thickener to get chili to desired consistency), cinnamon, corn and siracha sauce.

IMG_0035

Chili is a versatile dish that can be created a variety of ways.  I’ve seen recipes for southwest chicken chili, beef and butternut squash chili, chipotle steak chili, turkey and bean chili, bison chili and vegetarian chili.  No matter what your preference, there is a chili recipe out there to please your taste buds.  As far as chili recipes go, I’m a chili purist; I like to use traditional ingredients found in standard chili recipes (you won’t find pickle juice or siracha sauce in the slow cooker chili recipe) and hold firmly to the belief that there should be no beans in a bowl of chili.  This has less to do with the ongoing discussions within the Paleo/Primal community regarding consumption of legumes as part of a healthy diet.  I’m less concerned with this issue, and more concerned with beans ruining my meaty bowl of goodness.  As Texas chili champ Wick Fowler so eloquently stated, “If you know beans about chili, you know that chili has no beans.”

IMG_0068

No matter what your chili persuasion, I think you’ll love this recipe!  Allowing the ingredients to cook low and slow in the slow cooker results in a thick, smoky, flavorful bowl of chili.  I like to prep this chili on Saturday night, adding all of the ingredients into the slow cooker before heading to bed.  When I wake up the next morning, it is ready (making my Sunday morning meal prep a breeze)!

Enjoy, and please feel free to share in the comments below if you try this recipe!

Are you team beans or team no beans?

Slow Cooker Chili

Servings: serves 6-8


Ingredients:

  • 2 pounds chuck roast, cut into 1/2 inch cubes
  • 1/2 pound bacon, sliced
  • 1 yellow onion, diced
  • 1 red bell pepper, diced
  • 1 green bell  pepper, diced
  • 28 ounce can diced tomatoes
  • 6 ounce can tomato paste
  • 4.5 ounce can chopped green chilies
  • 2 cups beef broth
  • 8 garlic cloves, minced
  • 1/4 cup chili powder
  • 1 tablespoon cumin
  • 1 tablespoon oregano
  • 2 teaspoons paprika
  • 2 teaspoons sea salt
  • 1 teaspoon coriander
  • 1 teaspoon ground black pepper
  • 1/2 teaspoon cayenne pepper

Instructions:

  1. Pre-heat a large skillet over medium heat.  Add bacon slices to the skillet to cook, flipping once halfway through.  Fry bacon until just crispy.
  2. While the bacon is cooking, line a large plate with paper towels.  Once the bacon is finished cooking, remove skillet from heat and place the bacon slices on the paper lined plate to drain.  Once the bacon has cooled and is safe to handle, crumble the bacon into small pieces.
  3. Pour the excess bacon grease from the skillet into a small bowl, reserving 1 tablespoon of the grease in the skillet.
  4. Place the skillet back on the stove over medium heat.  Warm 1 tablespoon of the reserved bacon grease in the skillet.  Add the diced onion and peppers to the skillet, and sautee for approximately 8-10 minutes until the vegetables have softened.  Once the vegetables have finished cooking, add them to the bowl of the slow cooker.
  5. Place the skillet back on the stove over medium to medium-high heat.  Warm 2 tablespoons of the reserved bacon grease in the skillet.  Add the chuck roast cubes and sear the meat until browned, stirring occasionally to make sure that the chunks don’t stick together while browning.  Once the meat has browned, remove the skillet from the heat and add the meat to the bowl of the slow cooker.
  6. Add the remaining ingredients to the bowl of the slow cooker, and mix until thoroughly combined.
  7. Cover the bowl of the slow cooker with the lid, and cook on low for 10-12 hours.
  8. Once the chili has finished cooking, ladle the chili into serving bowls and top with your favorite chili fixings (i.e. cheddar cheese, cilantro, diced red onion, sour cream, etc.)

IMG_0040


Leave a comment

Yellow Squash, Fried Shallot and Bacon Quiche

IMG_8003

Some things are just meant to go together; milk and cookies, chocolate and peanut butter, bacon and well, pretty much everything!  I’ve been wanting to make another quiche recipe for a while.  I just love the way a quiche allows different ingredients to come together in combination with eggs and coconut milk to create unique and incredible flavor combinations.  In my first forage into making a quiche, I created a recipe for Balsamic Vinegar Glazed Caramelized Onion, Bacon and goat Cheese Quiche.  The recipe for it can be found here.  As it turns out, by making this new recipe, I can add another group of foods that are definitely meant to go together, yellow squash, fried shallots and bacon.

IMG_8031

When I first came up with this recipe, I planned on using zucchini as the base of the quiche.  In fact, the first two times I made this quiche, I used zucchini.  However, when I went to the grocery store to buy the ingredients to make the recipe for the third time as part of my recipe development, I learned that the store hadn’t gotten in their daily shipment of vegetables that morning.  In a fit of genius inspiration (and the fact that I didn’t want to go to another grocery store to shop for food), I decided to grab two yellow squash as a substitute for the zucchini.  For most people, yellow squash and zucchini are interchangeable, and there isn’t suppose to be much, if any, type of difference is flavor.  Therefore, I wasn’t to concerned about the swap.  But when I used the yellow squash in the recipe, for some explainable reason, the flavor of the quiche turned out even better.  I’m not sure if  the difference in taste was psychological, or the grocery store had a really good shipment of yellow squash over the past couple of weeks, but the results of this squash swap turned out pretty great, if I do say so myself.  I got third party confirmation of the better taste of this quiche from two of my friends, so my results are obviously steeped in heavy scientific research and are completely legitimate ;).

IMG_8019

This recipe calls for a pre-made pie crust.  My go to recipe for a gluten-free pie crust can be found in Danielle Walker’s Paleo cookbook Against All Grain (one of my favorite cookbooks for amazing Paleo, Primal, gluten-free and grain-free recipes).  There are many Paleo friendly pie crust recipes available.  Check out this almond flour pie crust from Elena’s Pantry, or this recipe for a savory pie crust from the Grain Free Kitchen.

This quiche would be perfect for breakfast or dinner.  I served this quiche alongside pan roasted asparagus, and it made for a scrumptious and filling meal.

Please let me know your results in making this recipe by leaving a comment below.  I really enjoy reading about your experiences in making the recipes I share!

Yellow Squash, Fried Shallot and Bacon Quiche

Servings: serves 6-8


Ingredients:

  • pre-made pie crust
  • 2 medium yellow squash, thinly sliced
  • 7 eggs
  • 1 cup mozzarella cheese (optional)
  • 1/2 cup coconut milk
  • 1/2 cup olive oil
  • 2 shallots, thinly sliced
  • 4 slices bacon
  • 1 tablespoon butter
  • 4 cloves garlic, minced
  • 1 tablespoon Italian seasoning
  • 2 teaspoons sea salt
  • 1 teaspoon ground black pepper

Instructions:

  1. Heat olive oil in a medium skillet over medium heat.
  2. While the oil is heating, line two plates with power towels.
  3. Once the oil in the skillet is hot, add the shallots and fry for approximately 10-12 minutes, stirring frequently while they cook until the shallots begin to brown.
  4. Once the shallots have browned, remove the skillet from the heat, and scoop the shallots out of the oil on place on one of the paper towel lined plates in order to get rid of the excess oil.  Once the shallots have drained and cooled, crumble them into smaller pieces and set aside.
  5. In a separate large skillet, add 4 slices of bacon.  Place the skillet on the stove, and cook the bacon on medium heat until the bacon is cooked through to desired consistency (I like my bacon cooked just until slightly crispy).  Remove the skillet from the heat, and place the bacon in the second paper towel lined plate in order to drain the bacon grease.  Once the bacon has cooled, crumble the bacon into small pieces and set aside.
  6. Wipe down the large skillet used to fry the bacon, and place the skillet back on the stove over medium-high heat.  Once the skillet has heated, add 1 tablespoon of butter to the skillet and allow the butter to melt.
  7. Add the minced garlic to the skillet, and sauté in the melted butter for 15 to 20 seconds.  Then add the yellow squash to the pan, and continue to sauté the yellow squash and garlic over medium-high heat until the yellow squash becomes tender, approximately 5-7 minutes.  Remove the skillet from the heat and allow the squash to cool slightly.
  8. Preheat the oven to 375 degrees.
  9. In a large bowl, whisk together the eggs, Italian seasoning, salt and pepper.
  10. Add the coconut milk to the egg mixture, and whisk further to throughly combine.
  11. Add the mozzarella to the egg mixture, and stir to incorporate (if using cheese).
  12. Lay the yellow squash all along the bottom of the pie crust, making sure that the yellow squash is evenly layered.
  13. Next sprinkle the fried shallots evenly over the squash.  Then sprinkle the bacon over the fried shallots.
  14. Pour the egg/coconut/mozzarella cheese mixture into the pie pan over the pie filling.
  15. Line a baking sheet with foil.  Place the pie dish in the middle of the baking sheet,  and cover the top of the quiche with foil (make sure the foil is tented over the quiche so that the foil does not touch the top of the quiche before it goes into the oven, or else the foil will stick to the top and be difficult to remove – learned that the hard way).
  16. Place the baking sheet with the quiche in the middle of the oven, and bake the quiche covered, for 45 minutes.
  17. After 45 minutes,  remove the baking tray from the oven and take off the foil from the top of the quiche.
  18. Place the baking tray back in the oven and continue cooking the quiche for 15-20 minutes.  Once it is done baking, take the baking tray out of the oven and let the quiche cool on the counter for for 5-10 minutes before serving.
  19. Eat up!


Leave a comment

Cinnamon and Browned Butter Mashed Sweet Potatoes

This recipe for Cinnamon and Browned Butter Mashed Sweet Potatoes is minimal on steps, but large in flavor.  The browned butter gives the sweet potatoes a rich nutty taste, and the coconut milk adds a creamy texture to the dish.   At first this seemed too simple to call a recipe, but I decided to go ahead and post it on the blog because it was something I really wanted to share with you guys!

IMG_6640

These mashed sweet potatoes go really well with my recipe for Slow Cooker Balsamic Pot Roast.  Throw in some roasted Brussels sprouts or green beans, and you’ll have a meal to please the entire family!  I have been tempted to eat these sweet potatoes as a meal on its own, but I have been able to resist that urge (though barely).

IMG_6647

I hope you guys enjoy these sweet potatoes as much as I do.  If you make this recipe, please feel free to share your results in the comments below.  I always love reading your experiences making the recipes I share on the blog!

Cinnamon and Browned Butter Mashed Sweet Potatoes

Servings: serves 4-6


Ingredients

  • 3-4 large sweet potatoes (approximately 3 1/2 pounds)
  • 1/4 cup butter
  • 1/3 cup canned coconut milk
  • 2 teaspoons cinnamon
  • 1 1/2 teaspoons sea salt

Instructions:

  1. Preheat the oven to 450 degrees.
  2. Line a baking tray with foil or parchment paper.
  3. Place the sweet potatoes on the lined baking tray.
  4. Once the oven has finished preheating, place the tray in the oven and bake the sweet potatoes until they are done, approximately 90 minutes (you’ll know the sweet potatoes are done if you can pierce the flesh of the potato easily with a knife or fork).
  5. Take the sweet potatoes out of the oven, and set aside to cool.
  6. Place the butter in a small saucepan, and then place the saucepan over medium high heat.
  7. Melt the butter in the saucepan.  After the butter has melted, it will begin to foam.  Stir the butter constantly over the heat until the milk solids in the butter begin to brown.  As the butter browns, it will give off a slightly nutty aroma.  As soon as the solids turn brown and give off the nutty aroma, remove the butter from the heat immediately and set aside.
  8. Once the sweet potatoes have cooled enough to handle, peel the skin from the potatoes, and place the  sweet potato flesh into a large bowl.
  9. Add the browned butter, cinnamon, coconut milk and sea salt to the large bowl, and mix everything until thoroughly combined.
  10. Place in a serving bowl, and serve alongside your main course.


4 Comments

Slow Cooker Honey Balsamic Pot Roast

IMG_4212

Happy Friday!  This weekend is going to be packed full of fun things.  I’ll be volunteering as a judge at Fittest in OK, a local CrossFit competition hosted by my gym, CrossFit 405.  The competition will be held at Cox Convention Center January 24 and 25, and will feature some great athletes from around Oklahoma.  If you live in or around the area, come by and check it out!

I love volunteering as a judge for local competitions in Oklahoma.  It’s great watching people from all types of athletic backgrounds (from people just starting out, to semi-seasoned pros) lay it out all on the floor once the clock counts down; 3……2……1… go!  I’ve participated in several team competitions over the years (but have not competed as an individual….yet!).

I’ll be volunteering both Saturday and Sunday, which will take up a majority of my weekend.  Thankfully, I was able to meal prep last weekend, and made several things that will help me be ready for next week since I won’t have much time to spend in the kitchen this weekend.  I’m a big fan of prepping food during the weekend.  Knowing that I spent a couple of hours during the weekend cooking up proteins and chopping veggies to create quick and delicious meals helps take the stress off of worrying about what I’m going to eat when I get home from work during the weekday.

This recipe for Slow Cooker Honey Balsamic Pot Roast is a great addition to any meal prep.  The combination of sweetness from the honey and the tangy kick from the coconut aminos help the flavors in sauce come alive!  In addition, slow cooking the pot roast over low heat allows the sauce to tenderize the meat, and the result leaves you with fork tender bites of pot roast.

IMG_4173

I originally made this recipe as part of Christmas dinner last year when I was in Houston for the holidays.  Since then, I’ve made it several times over the past month.

This recipe would be great paired with my Roasted Sweet Potatoes and Brussels Sprouts.  It also goes well with mashed sweet potato, and I’ve got a new recipe for mashed sweet potatoes that I’ll be sharing with you next week.  Until then, please enjoy this recipe for Slow Cooker Honey Balsamic Pot Roast.

If you try this recipe, please let me know what you think.  I love reading your comments!

IMG_4229

Slow Cooker Honey Balsamic Pot Roast

Servings: serves 8-10


Ingredients

  • 3 1/2 – 4 pound boneless chuck roast
  • 2 tablespoons cooking fat (i.e., lard, butter, olive oil, avocado oil, coconut oil)
  • 2 large onions, peeled and thinly sliced
  • 1 cup beef broth
  • 1/2 cup balsamic vinegar
  • 2 tablespoons coconut aminos
  • 1 1/2 tablespoons honey
  • 1 teaspoon dried thyme
  • 1 teaspoon dried rosemary
  • 4 cloves garlic, minced
  • sea salt
  • ground black pepper

Instructions:

  1. Heat cooking fat over medium high heat in a large skillet.  While the fat is heating, liberally season both sides of the chuck roast with salt and pepper.
  2. Add the chuck roast to the preheated skillet, and sear on one side for approximately 7-8 minutes until browned.  Then flip over and sear the other side of the chuck roast for 7-8 minutes.
  3. While the meat is cooking on the stove, in a medium sized bowl, mix together the beef broth, balsamic vinegar, honey, coconut aminos, thyme, rosemary and minced garlic.
  4. Remove the skillet from the heat, and set the chuck roast aside on a large plate.
  5. Remove all but one tablespoon of cooking fat from the skillet, and then place the skillet back on the stove (with the 1 tablespoon of cooking fat).
  6. Add the onions to the skillet, and sautée over medium heat until the onions turn golden brown, 8-10 minutes.
  7. Remove the onions from the heat, and place into the bottom of the slow cooker insert.
  8. Place the chuck roast on top of the onions, and then pour the sauce mixture over the chuck roast.
  9. Cover the meat, and cook on low for 8-10 hours, or on high for 4-5 hours.
  10. Once the meat has done cooking, you can shred the meat with a fork, plate and serve!  Be sure to use the liquid from the slower cooker as gravy/sauce for the pot roast.


Recipe inspired by Add a Pinch.


Leave a comment

Browned Butter Banana Bread with Paleo Nutella Swirl

IMG_8180

I’m somewhat of a procrastinator in certain areas of my life.  Don’t get me wrong, I like to make lists and then check things off. A checked off list makes me feel all warm and fuzzy inside.  But sometimes, I just want to sit on my couch and read a kindle book, instead of acting like a grown-up (aka, doing my chores).  This is especially true on Sunday afternoons after I’ve finished meal prepping for the week, but before the laundry is done and the pile of dishes from meal prep have been washed.

However, I would recommend not procrastinating in making this banana bread.

This recipe is based off of my recipe for Paleo Pumpkin Chocolate Layered Bread with Chocolate Chips and Walnuts.  The addition of browned butter to this recipe adds another level of taste to an otherwise great recipe.  Browning butter is a technique that involves melting butter over medium to medium-high heat on the stove.  Heating butter after it melts results in the milk solids in the butter beginning to brown.  As the milk solids begin to brown, the butter gives off a nutty aroma.  The browned butter adds a nutty and slight butterscotch flavor to recipes.  I’ve added browned butter to several recipes, including cookies, sweet potatoes, and mashed cauliflower.

The addition of browned butter to this recipe for banana bread enhances the flavor of the walnuts, and adds a richness and depth to the overall taste of the bread.

IMG_8174

This banana bread is decadent, rich, and moist, and the combination of ingredients allows the flavors to combine to create a taste sensation sure to please a hungry crowd.

This banana bread would be great for a holiday party, or for Christmas breakfast/brunch.  Enjoy!

IMG_8197

Browned Butter Banana Bread with Paleo Nutella Swirl

Servings: makes 12-15


Ingredients:

  • 1 cup almond flour
  • 1 cup banana, mashed (2-3 small overly ripe bananas)
  • 1/2 cup tapioca flour
  • 1/2 cup butter
  • 2/3 cup Paleo Nutella
  • 1/3 cup honey
  • 1/4 cup coconut flour (sifted)
  • 1/4 cup chopped walnuts
  • 3 eggs, beaten
  • 1 tablespoon vanilla extract
  • 1 ½ teaspoons cinnamon
  • 1 teaspoon baking soda
  • 1 teaspoon baking powder
  • 1/2 tsp teaspoon salt
  • 1/2 tbs coconut oil (to grease the pan)

Instructions:

  1. Preheat oven to 350 degrees.
  2. Preheat a medium sauce pan over medium-high heat. Once the pan is hot, add ½ cup of butter to the pan and allow the butter to melt.
  3. Stir the butter constantly in the sauce pan as it melts. After the butter has melted, it will begin to foam.  As the butter foams, the milk solids from the butter will begin to darken, turning first to a tan color, and then to brown as it continues to cook.  As the butter browns, it will give off a slightly nutty aroma.  As soon as the solids turn from tan to brown and give off the nutty aroma, remove the sauce pan from heat immediately so that the milk solids do not burn.  Set aside to cool.
  4. Grease a 9 x 5 x 3 inch bread pan with coconut oil (you can also use butter), and then line the bottom of the pan with parchment paper.
  5. In a large mixing bowl, add almond flour, tapioca flour, coconut flour, cinnamon, baking soda, baking powder and sea salt.  Stir to combine.  Set aside.
  6. In a separate bowl, add eggs, mashed banana, honey and vanilla extract.  Stir to combine.  Then add the browned and cooled butter, and stir to combine.
  7. Pour the liquid ingredients into the dry ingredients, and stir the mixture thoroughly to incorporate.
  8. Let the batter sit on the counter for 3-4 minutes (this lets the coconut mixture soak up the moisture).
  9. Add Paleo Nutella to the batter, and gently swirl the Paleo Nutella through the bread batter using a spatula (do not fully incorporate the Paleo Nutella into the batter).
  10. Add the bread batter to the coated bread pan.
  11. Place the bread pan in the preheated oven and bake the bread for 50-55 minutes, until a toothpick inserted into the bread comes out clean.
  12. Once the bread is finished, remove from the oven and let cool on the counter for 5 to 10 minutes before removing the loaf of bread from the bread pan to cool further.
  13. Serve and enjoy!