baconwrappedbarbells


1 Comment

Cashew Butter Chocolate Chip Cookies

I’m relatively new to food blogging, so I’m learning as I go along.  I’m used to making things on a whim when it comes to cooking, and everything usually ends up being pretty tasty, and sometimes even better than expected!  But as it turns out, developing recipes for gluten-free baked goods is a whole other animal.  The ratio of gluten-free flours (i.e., coconut flour, almond flour, cashew flour, etc.) to liquids (i.e. eggs, liquid sweetener, etc.) is not consistent across the board, and can vary wildly depending on what ingredients you want to use for a recipe.

Normally, I typically just follow a recipe when I bake gluten-free treats and breads.  But I wanted to create a brand new recipe for the blog, and to do that I need to experiment in the kitchen.  After much trial and error, and several batches of cookies later, I think I’ve come up with a recipe that will not disappoint!

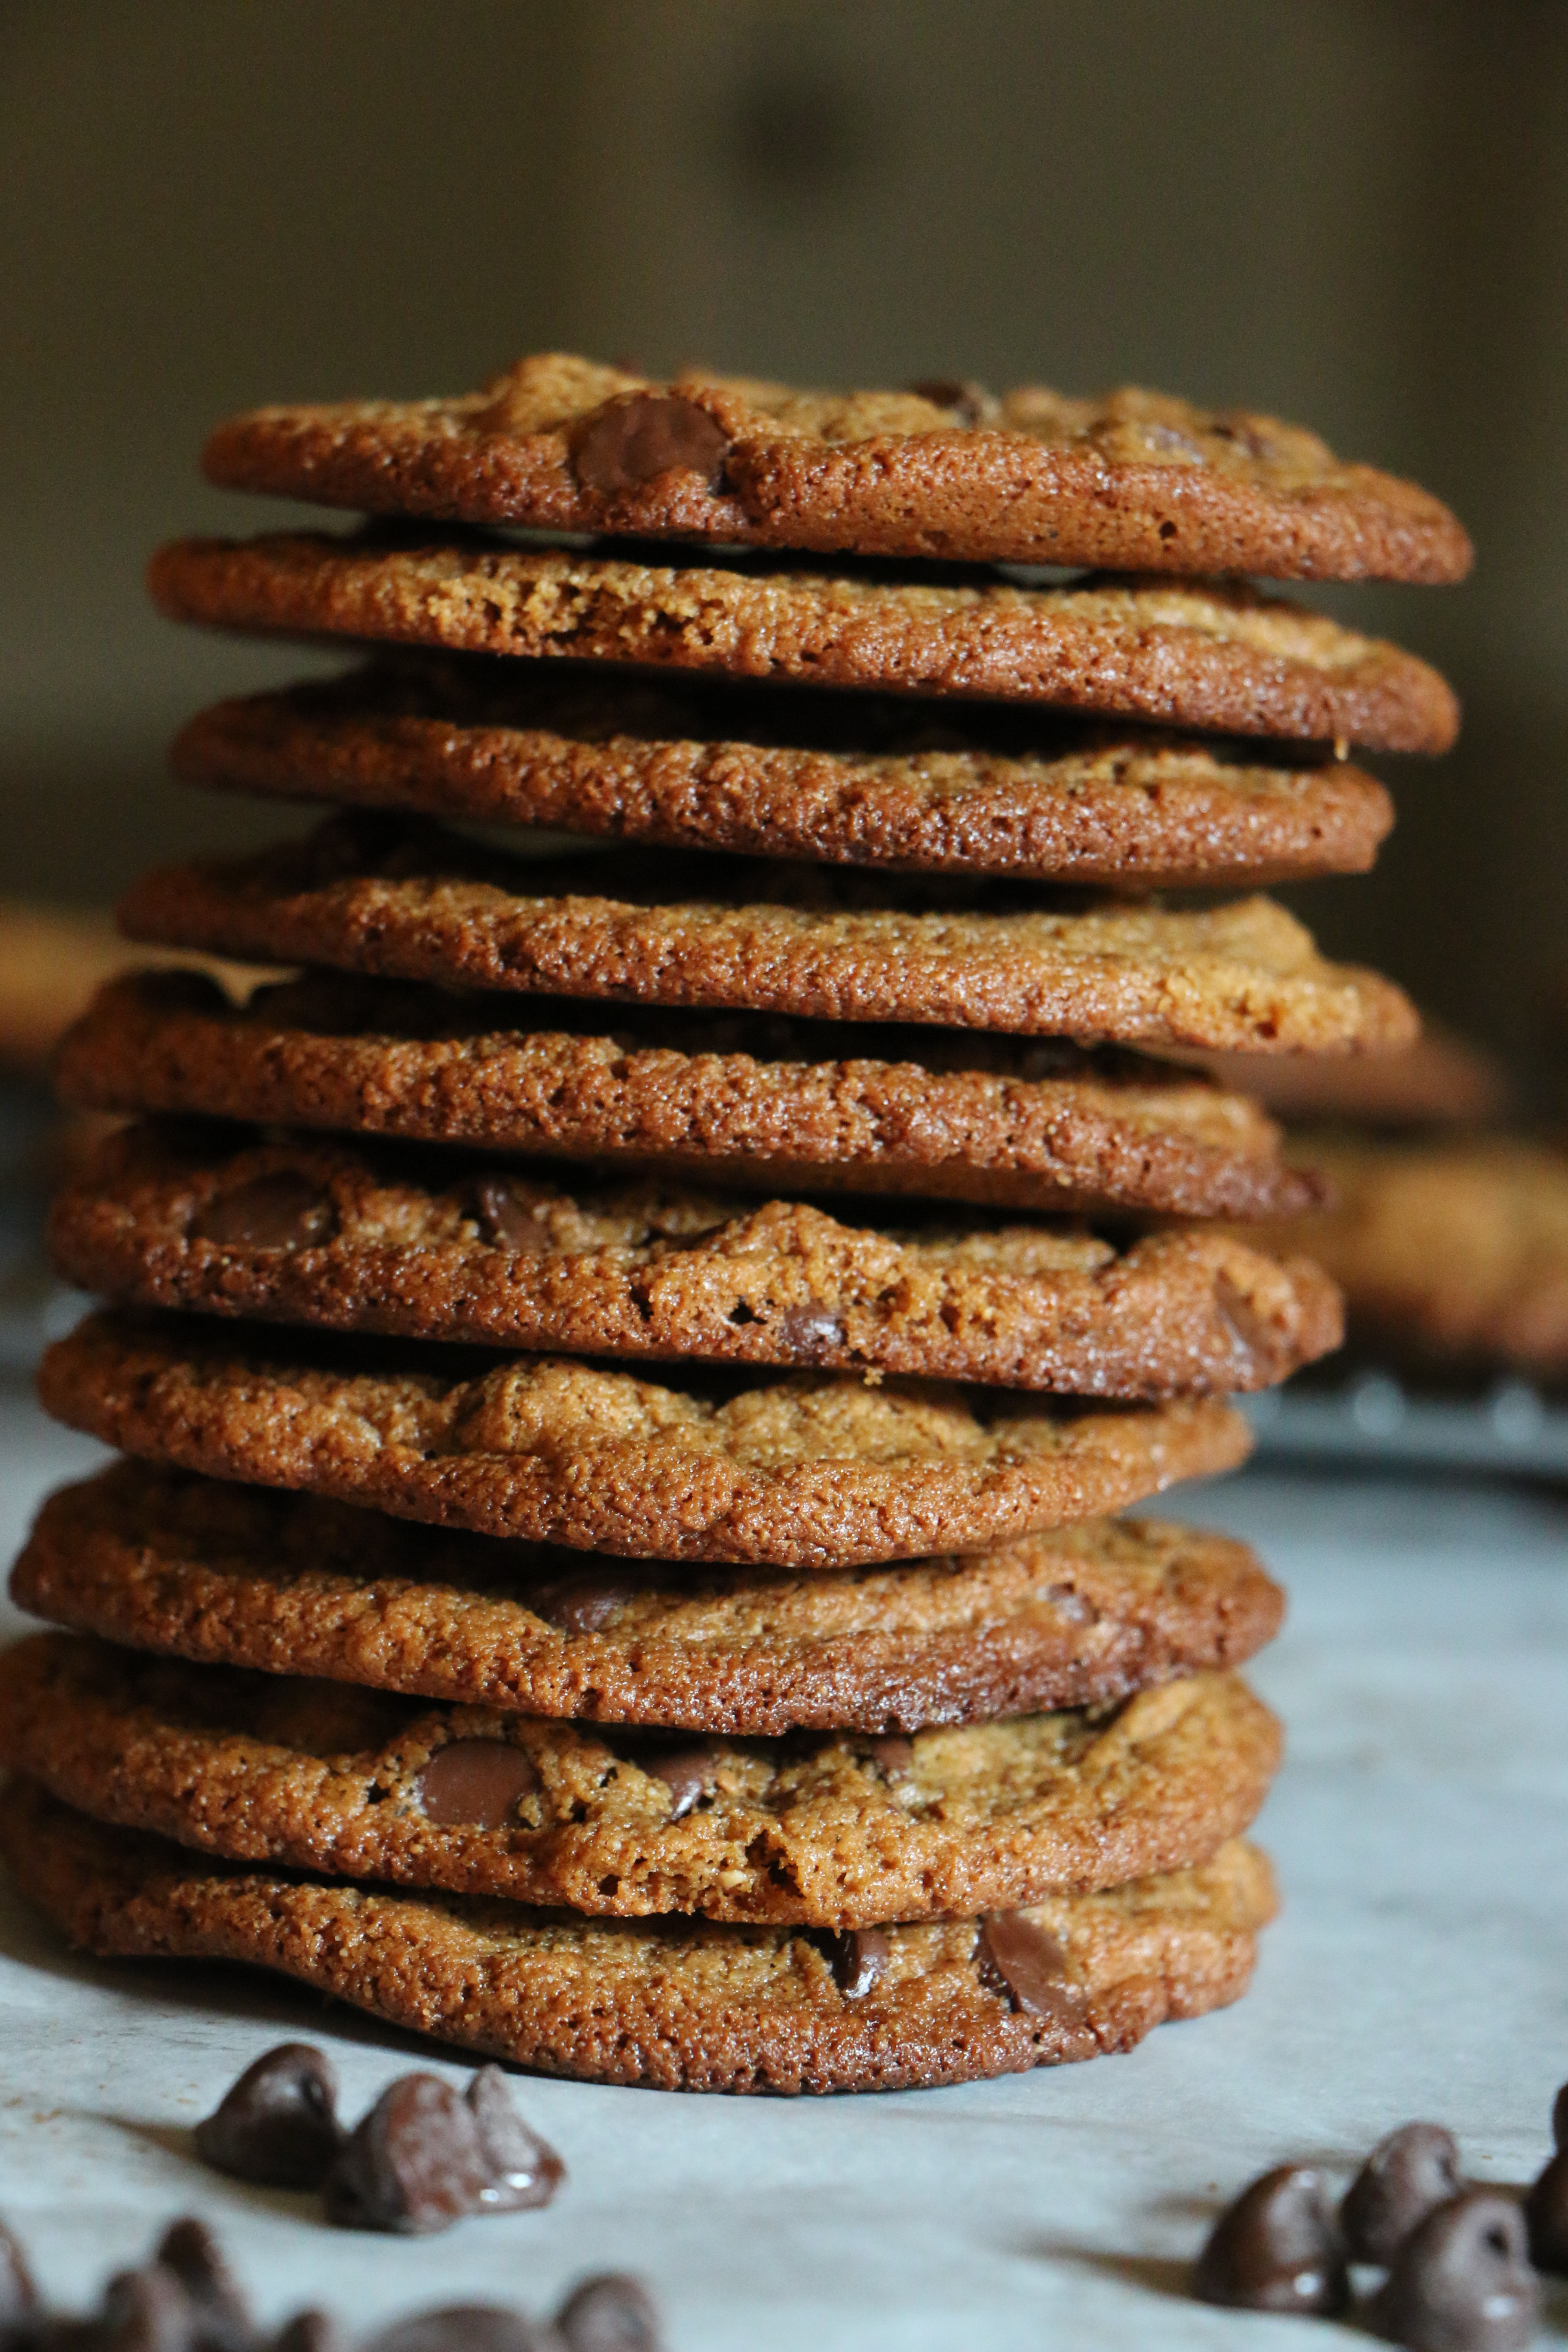
This recipe for Cashew Butter Chocolate Chip Cookies tastes delicious, and has been a hit with all of my friends and co-workers.  I’ve had several people tell me they couldn’t tell it was gluten-free/Paleo friendly, and that it just tasted like a delicious chocolate chip cookie.

IMG_0602

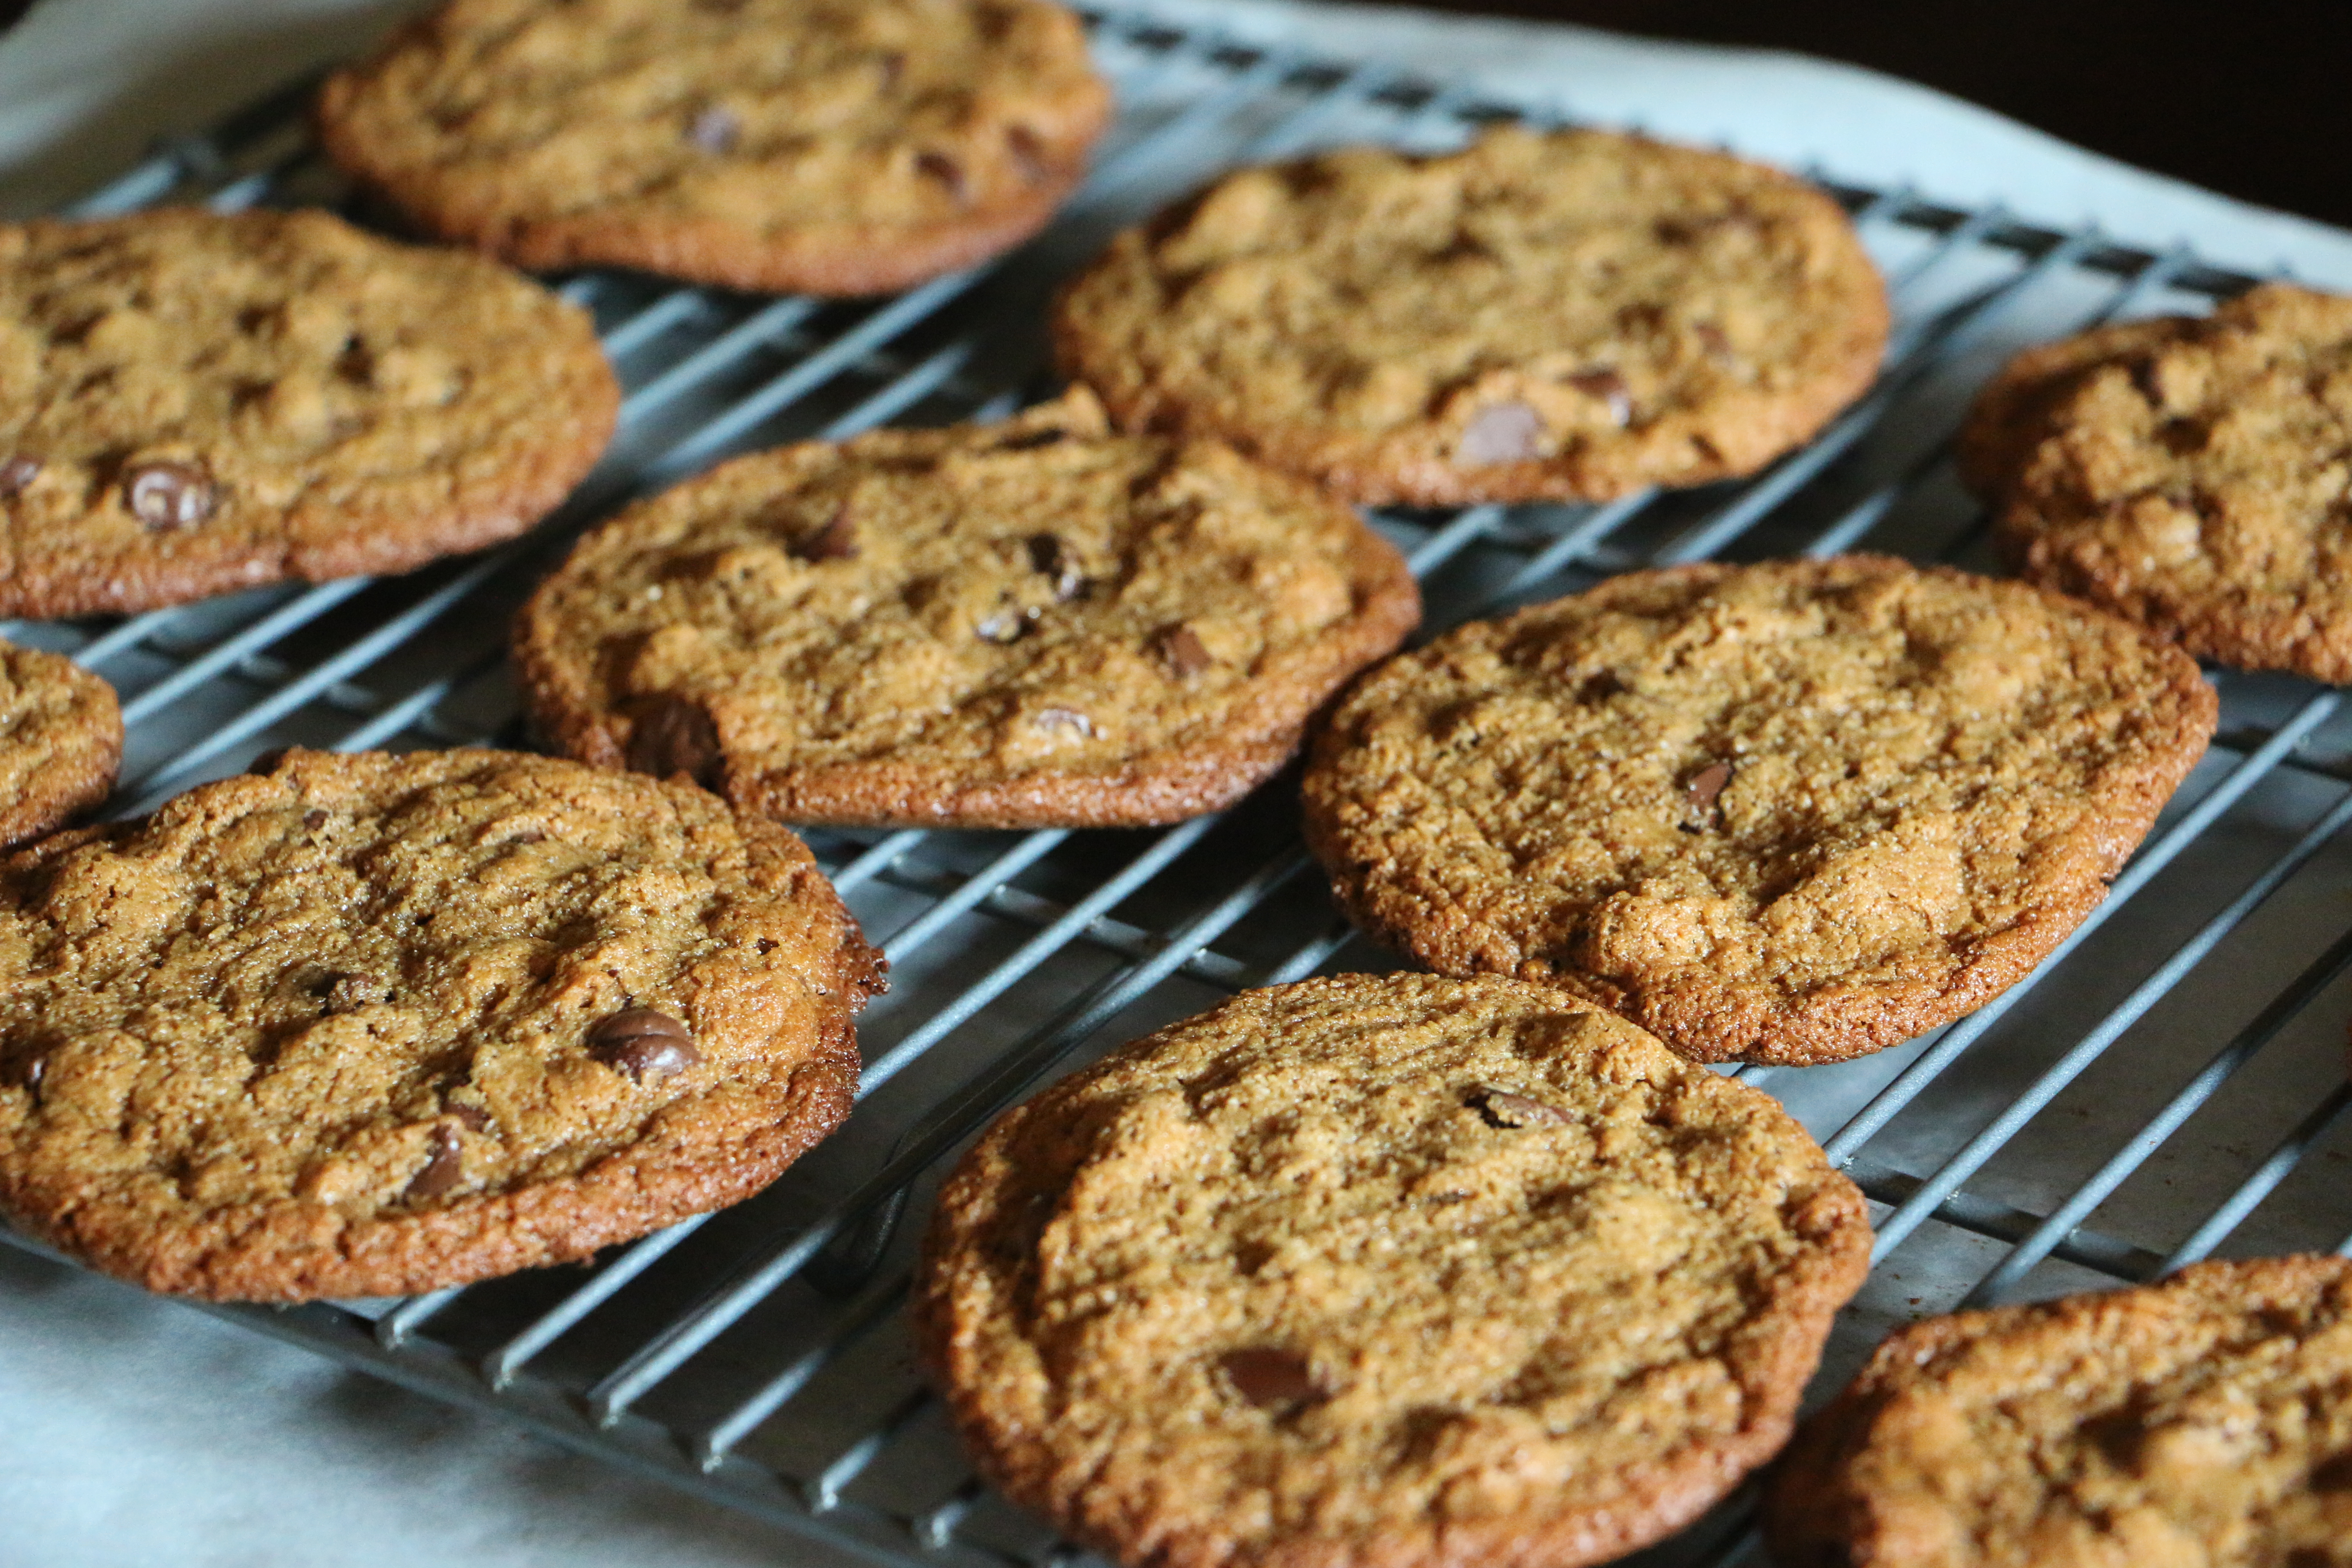
I’ve had requests to make several batches of these cookies, so be warned that if you take them to a party, you may have people wanting to become your best friend so that you’ll whip up some more.

IMG_0649

CASHEW BUTTER CHOCOLATE CHIP COOKIES inspired by Slim Palate

Servings: makes 18-20 cookies


Ingredients:

  • 1 cup creamy cashew butter
  • 1 egg, plus 1 egg yolk (room temperature), beaten
  • 1 tablespoon vanilla extract
  • 1 cup coconut sugar
  • 1 teaspoon baking soda
  • 1 teaspoon salt
  • 6 ounces dark chocolate chips

Instructions:

  1. Preheat oven to 350 degrees.
  2. Line a baking sheet with parchment paper.
  3. In a large mixing bowl, combine the cashew butter, egg and egg yolk,  and vanilla extract, and stir until all of the liquid ingredients are well combined.
  4. In a separate bowl, mix together the coconut sugar, baking soda and sea salt.
  5. Add the coconut sugar mixture to the liquid ingredients in the large mixing bowl, and mix everything together until all of the ingredients are fully incorporated (you’ll need a little muscle to do this, but you want to make sure all of the ingredients are mixed throughly.  You can do it!).
  6. Add in the chocolate chips, and stir to combine.
  7. Place dough on the parchment sheet, about 1 and 1/2 tablespoons per cookie.  Don’t crowd the sheet with dough.  I would only do eight or nine cookies at a time on one tray, since the dough spreads on the pan while baking.
  8. Place in the higher rack of the oven, and bake for approximately 12 minutes.
  9. Take the cookies from the oven, and cool on parchment paper for at least 10 minutes before serving.

IMG_0607


Leave a comment

Mongolian Beef

I have many friends who eat a gluten-free and/or grain-free diet, either for weight-loss, medical reasons, or as part of an overall healthy lifestyle.  But I also have many friends that don’t, and within that subset are friends that seem dubious over the possibility of eating gluten-free meals that actually taste good.

Just so you know, when I cook for a non-paleo palate, my priority is serving meals that taste good.  I don’t ever plan on springing  organ meats and fermented foods to my dinner guests the first time they come over.  Let’s be real, even I don’t eat that kind of stuff (I have beef liver sitting in my freezer, and still don’t have the courage to actually make a meal out of it).  My goal is to make foods that are so delicious, no one questions whether or not it is “weird diet food.”

One of my go to recipes that never disappoints in flavor is Mongolian Beef from The Iron You.  This recipe is full of flavorful ingredients like fresh ginger and minced garlic, and the dish can be paired with white rice or cauliflower rice (if you want to keep it lower in carbs).

My friend Krystal and her boyfriend Josh were in town for the weekend, and came over Sunday afternoon for lunch.  Since I knew it had never failed me before, I figured Mongolian Beef would be the perfect meal to share with them.

IMG_9650

Krystal was in town this weekend for a wedding reception.  I always love hanging out with her and sharing about some of our favorite things (which include cupcakes and working out).  With a sweet personality and infectious smile, it’s hard to be in a bad mood when she is around.  She has her own blog Moving Wright Along which I recommend you check out, where she shares her adventures in healthy living while going back to school to become a Registered Dietitian.

As I knew it would, the meal did not disappoint.  Krystal’s boyfriend Josh doesn’t a eat gluten-free diet, but liked it so much that he hinted to Krystal that he wouldn’t mind this meal being included in their regular dinner rotation.  Recipe success!

I hope you like the recipe as much as Krystal and Josh did.

IMG_9597

Recipe

Mongolian Beef – recipe adapted from The Iron You.

Servings: serves 3-4


Ingredients

  • 1 pound flank steak, thinly sliced
  • 1/2 cup coconut aminos
  • 1/2 cup water
  • 1/3 cup coconut sugar
  • 2 tablespoons olive oil, plus two teaspoons olive oil (divided)
  • 4 cloves of garlic, minced
  • 1 tablespoon fresh ginger, peeled and grated
  • 1/4 cup arrowroot powder
  • 1 teaspoon red pepper flakes (optional)
  • 1/4 teaspoon ground black pepper
  • 2 scallions, sliced thinly

Instructions:

  1. Combine the coconut aminos and water into a small bowl.
  2. Heat two teaspoons of olive oil in a saucepan over medium heat.
  3. To the heated oil, add the ginger and garlic and saute for 30 seconds, and then quickly add the coconut aminos/water mixture before the garlic scorches.
  4. To the saucepan, add the coconut sugar, ground black pepper and red pepper flakes (if using)
  5. Raise the heat on the mixture and simmer for about 4 to 5 minutes, until the sauce thickens.
  6. Remove the saucepan from the heat and set aside.
  7. Combine beef slices and arrowroot powder in a ZipLock bag (or in a shallow dish) and toss until all beef slices are evenly coated.
  8. Heat remaining 2 tablespoons of olive oil in a large frying pan (or wok), until it’s hot but not smoking. Add beef and saute/stir-fry for 2-3 minutes, until it begins to darken around the edges, stirring every now and then so that it cooks evenly.
  9. Remove the beef from the frying pan and clean the pan (but be careful, since the pan will be hot).
  10. Return the pan back over the heat, add the meat and simmer for one minute.   Then add the sauce and cook for one additional minute stirring constantly.
  11. Add the green onions and cook for one further minute.
  12. Transfer to a plate leaving the excess sauce in the pan and serve.